First I put the Airthings ViewPlus to the test at home, then Dan did the same. Here’s why it still gets a solid thumbs-up from us, two years on!
Airthings ViewPlus Air quality Monitor at a Glance
- A simple display offers customizable readings and a quick assessment of overall air quality
- Incredibly easy to set up and use, using Bluetooth
- Connects to WiFi and has a handy app for on-the-go air quality checks
- Very unobtrusive aesthetic, with rounded edges and a matte white finish
- Has a calm grey/black display showing you select readings on the monitor itself
- Easy to stand up on a shelf or desk, or can be mounted to a wall
- Monitors radon, unlike most other monitors.
- We wish more data was available on the monitor without the need to consult the app or web dashboard.
- Would like to see better instructions for accessing the USB-C cable.
We’ve been using the View Plus air quality monitor from Airthings for a few years now and still rely on it to alert us to high particulate matter, high CO2, and other potential issues with indoor air quality. This monitor has been consistent, reliable, and I’ve only had to change the batteries once in 18 months!
Here’s Dan’s video review of the View Plus, followed by a good amount of nerding out by me.
What does the ViewPlus measure?
The ViewPlus can measure seven things:
- Radon (which most monitors can’t measure)
- Particulate matter (PM) 2.5
- Carbon dioxide
- Volatile organic compounds (VOCs)
- Humidity
- Temperature
- Air pressure.
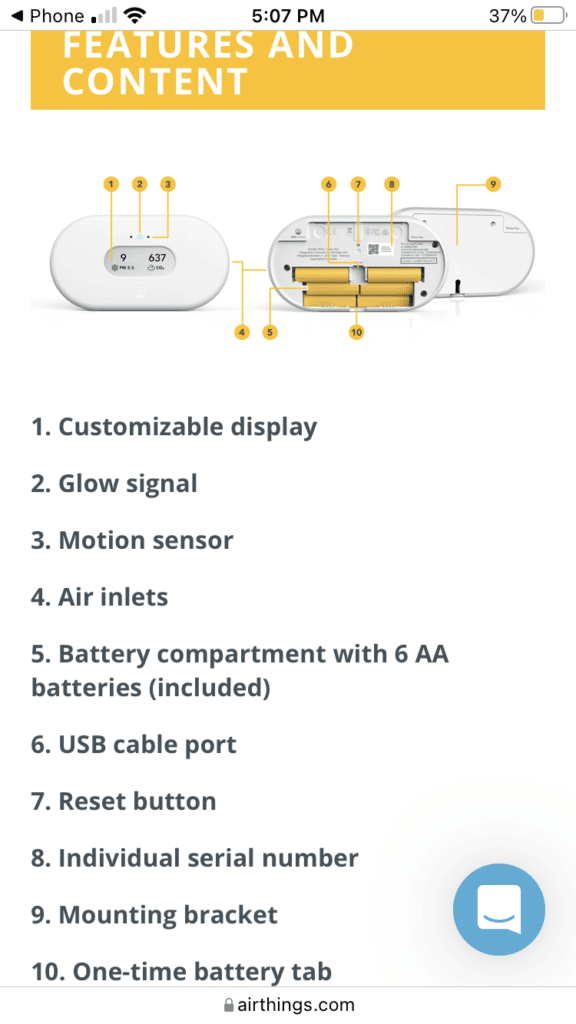
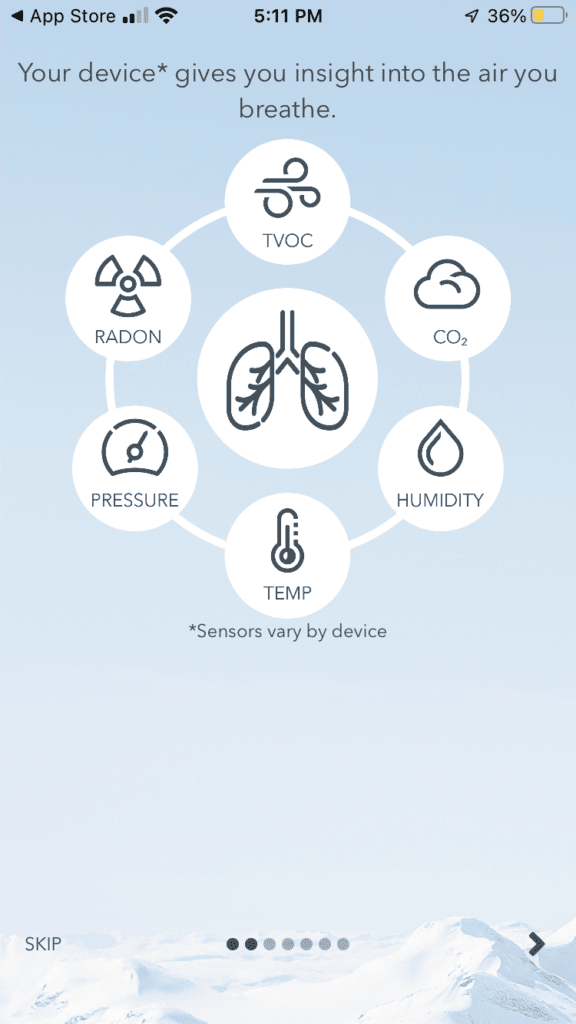
The major difference between the ViewPlus and the WavePlus is that the ViewPlus offers readings of overall air quality and two preferred measures on the monitor itself.
With the WavePlus, you can only get the readings by logging into the smartphone app.
More specifically, the Airthings ViewPlus uses measurement methods including:
- Passive diffusion chamber radon sampling
- Alpha spectrometry and non-dispersive infra-red (NDIR) for CO2 – in a range of 400-5000 ppm
- Laser scattering-based optical particle counter for PM 2.5 – in a range of 300 nm to 10 μm.
Although Blueair filters do this from one device, the ViewPlus also connects with the Renew, Airthings latest air purifier product. This seamless interconnectivity allows you to monitor air quality and do something about it but turning on or up your air purifier as needed.
The Airthings ViewPlus can also collect data on outdoor air quality when connected to WiFi. This includes letting you know the local pollen count. You can even plug the monitor into a USB-C port to make it a monitoring hub connected to additional monitors elsewhere in your home or other space.

Out of the box
My Airthings ViewPlus arrived in a robust cardboard package, well-protected but without any single-use plastics. The monitor is battery operated, meaning it has a charge right from the get-go. All you have to do is pull the battery tab (to let the current flow) and it starts up right away.
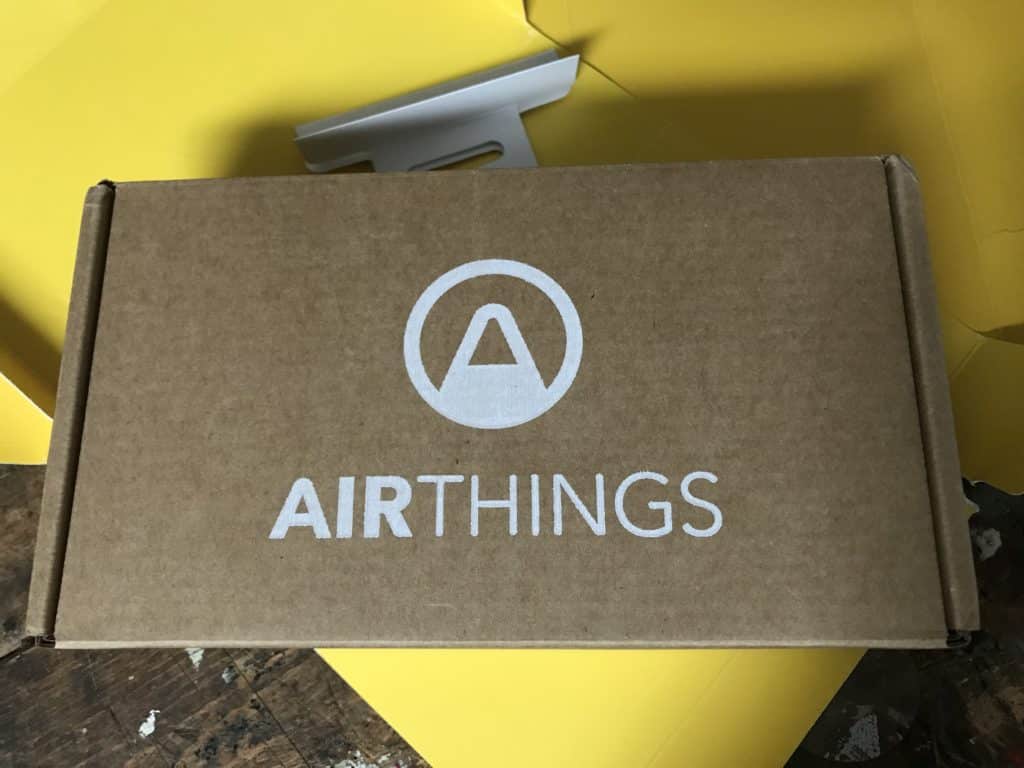

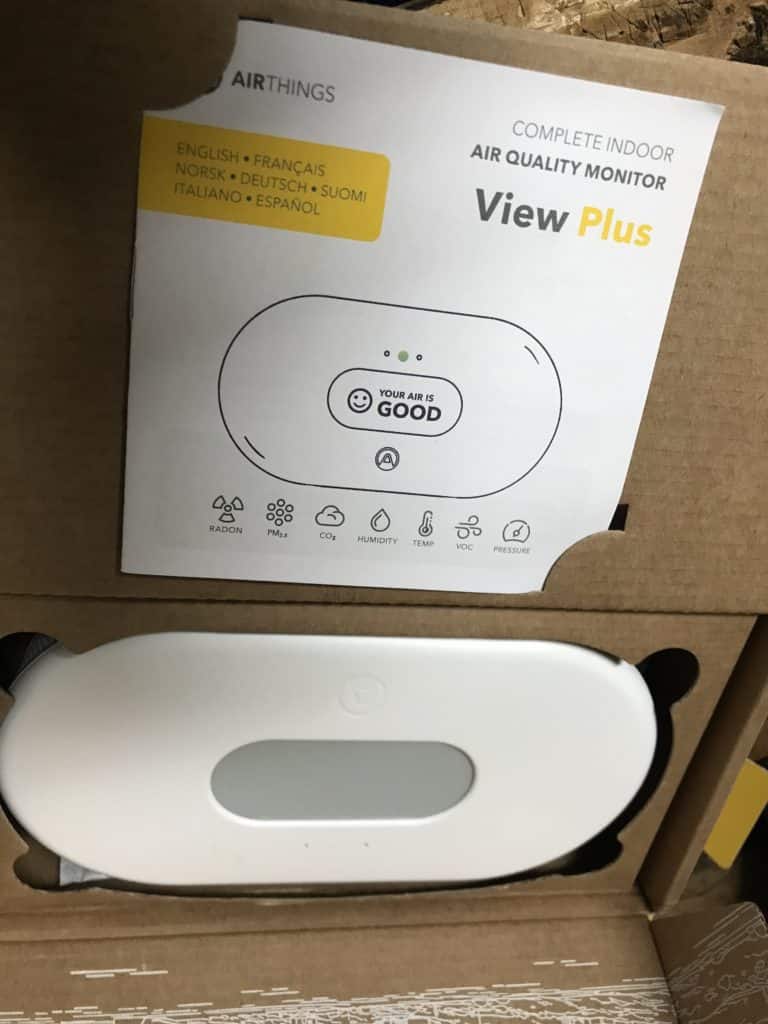
Before you can use the ViewPlus, you’ll need to download the Airthings app. The set-up instruction booklet has a QR code to scan, but this didn’t work for me, and I had to find the app the old-fashioned way by searching in the app store on my phone. It was really easy to set up though, as long as you have your WiFi network password handy.
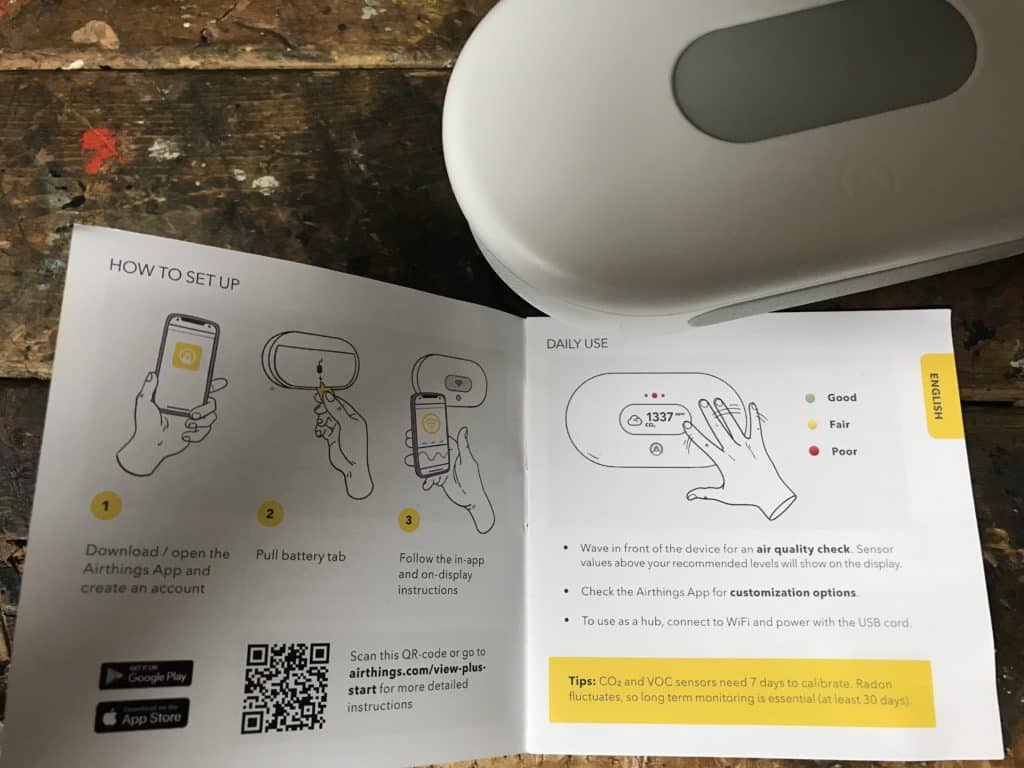
In the app, you get a prompt to register with an email address and create a password. Once you’re logged into the app, the next step is to pair your smartphone and account with your new device. This was a very smooth and instantaneous process for me. It was so fast, in fact, that I didn’t even manage to get a screenshot of it trying to find and sync with the device!
After it pairs, the ViewPlus is ready to go, at least in terms of readouts for:
- Temperature
- Humidity
- Radon
- Air pressure
- Particulate matter.
Using the Airthings ViewPlus
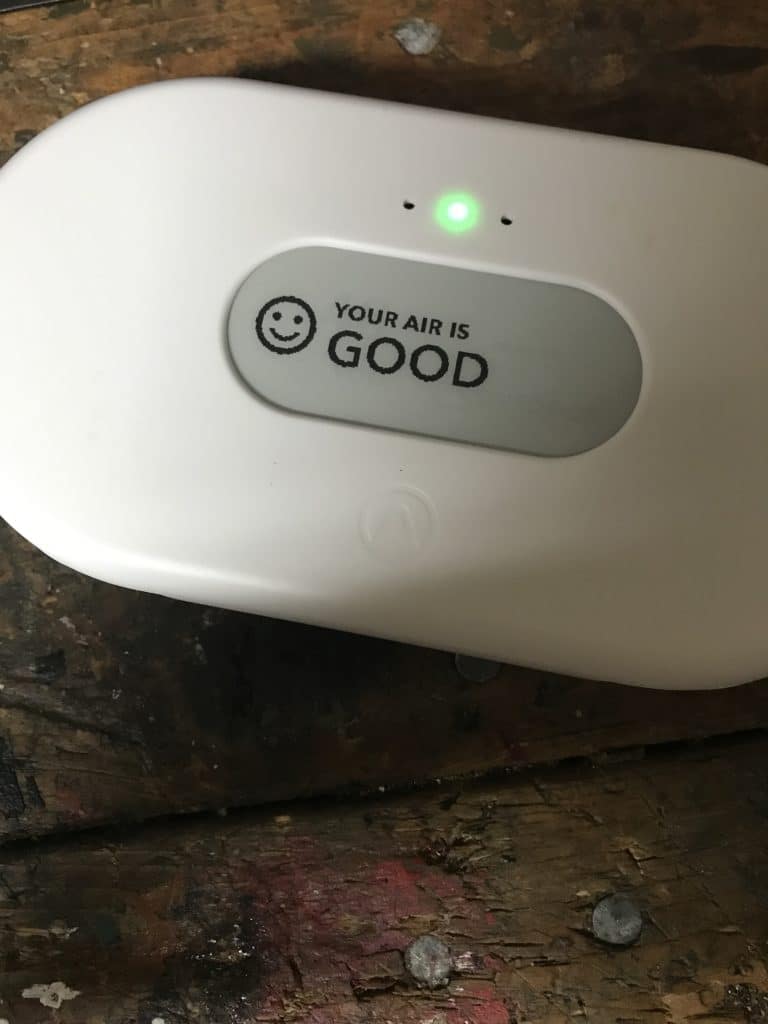
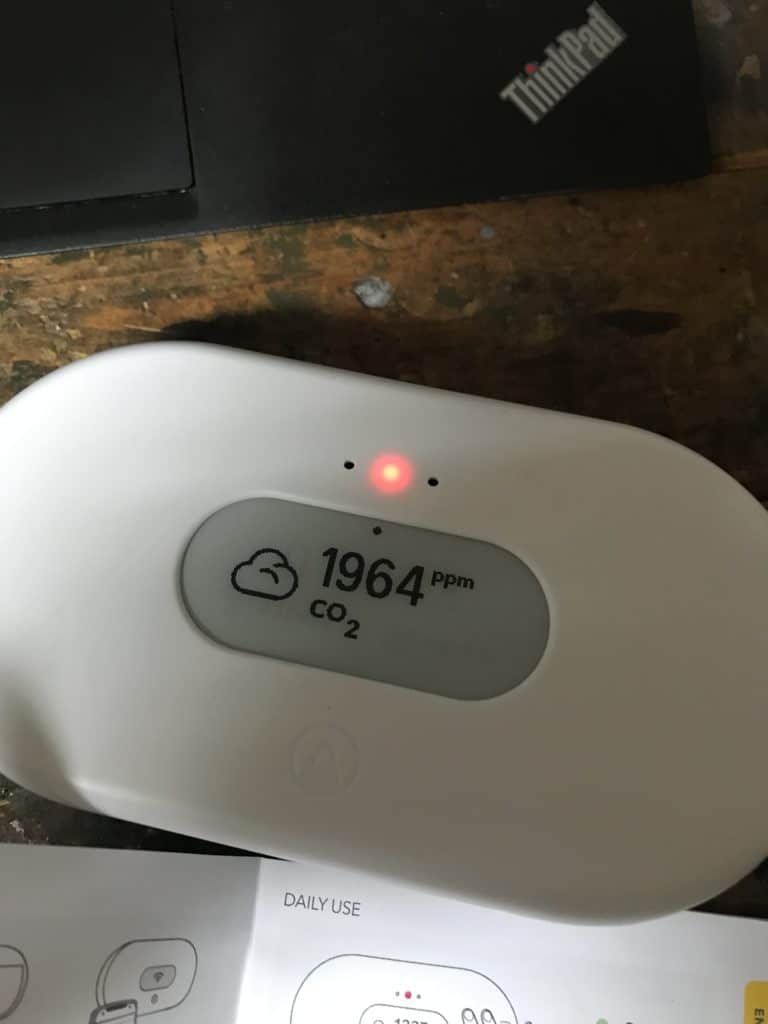
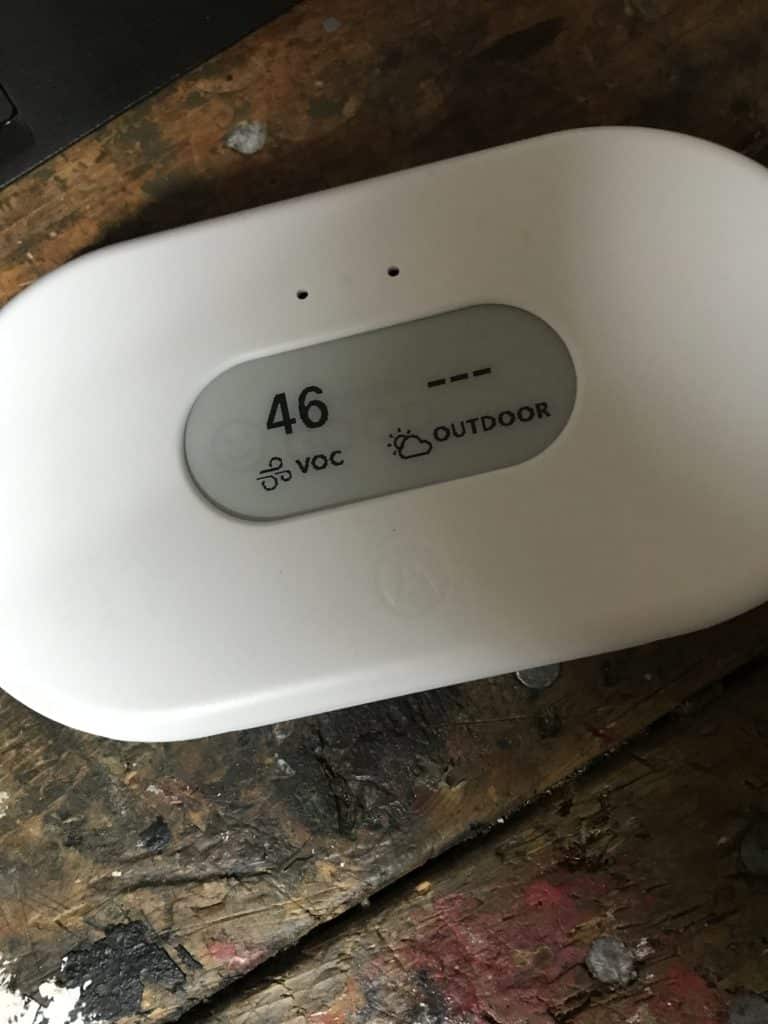
I’m happy to report that my initial air quality reading in my office was ‘Good’! A nice green light flashed to tell me as much, and a smiley face appears on the display with the word ‘Good’. Alas, this joy was short-lived as the CO2 readout quickly skyrocketed, getting up to 1700 or so, which firmly put the air quality into the realm of ‘bad’.
Initially, I assumed this high level of CO2 was a calibration issue and not an accurate reflection of the air quality in my office. Unfortunately, the readout barely dropped below 1200 over the next week and never went below 1000. This has definitely got me thinking about ventilation in my office, given the effects high CO2 levels can have on brain function and energy.
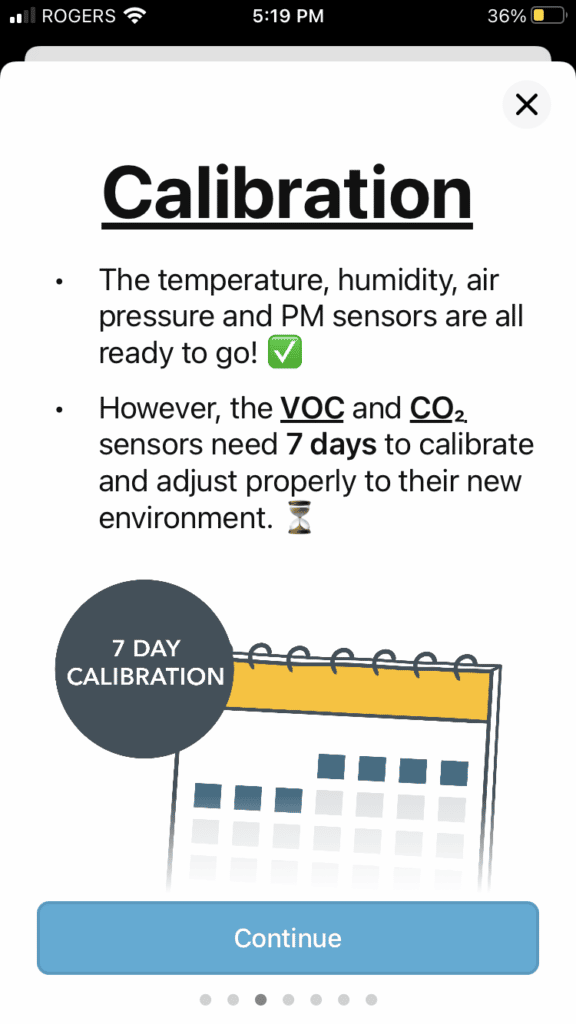
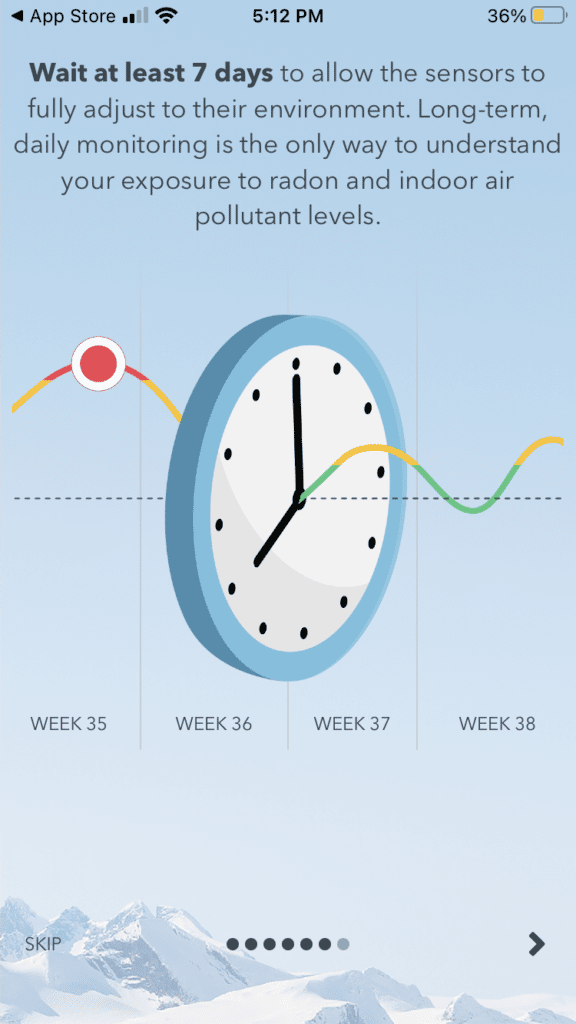
In general, though, if the ViewPlus shows erratic or high levels of CO2 and VOCs in that first week of calibration, I wouldn’t panic. The time to worry is if the levels stay high after the monitor is done calibrating, or if radon or PM measures are high right from the start.
Diagnosing issues with air quality
Aside from the issue with CO2, the overall air quality in my home office seems pretty good currently. That’s likely because:
- It’s not wildfire season
- We’ve got our windows closed most of the time (so the wood-burning stove smoke from neighbors doesn’t get in)
- We’re not actively doing any renovations
- We don’t have new furniture, products, or hobbies that off-gas VOCs.
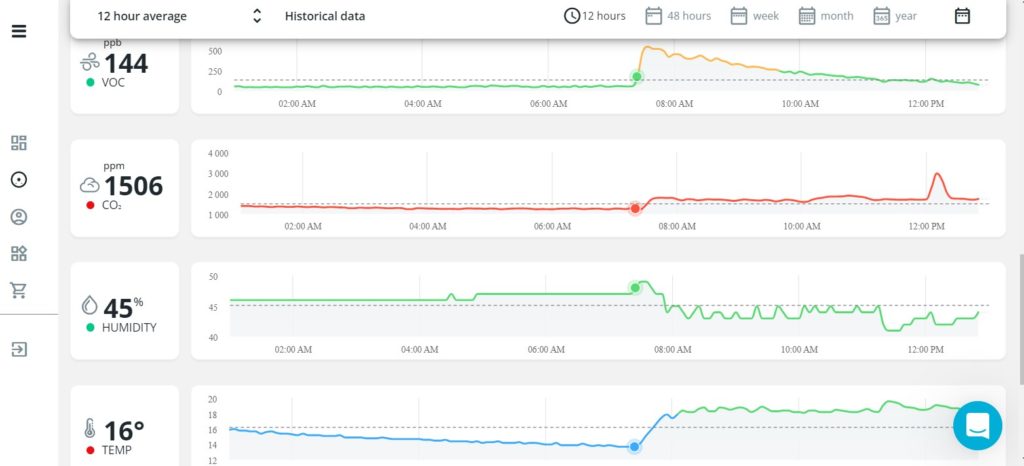
What I did notice, though, after more than a week of using the monitor was a clear increase in CO2 and VOCs just after our gas heating came on in the morning. We upgraded to a heat pump in 2023 but still had a gas furnace when I first got this monitor. And, unfortunately, the gas furnace was right next to my basement office.
While the increase in VOCs and CO2 isn’t putting the air quality into dangerous territory, it doesn’t feel good to see that spike. Suffice it to say that I’m even more excited to have switched out that gas furnace for a heat pump and heat pump water heater .
I have also noticed that the air quality monitor shows an increase in PM 1 and PM 2.5 at one or two points most days. The timing of these increases almost directly correlates with when we cook in the evening, and when we make lunch.
In fact, the first alert I got via the Airthings app was to let me know that the PM count in my office was high, right after my wife rather enthusiastically roasted some hazelnuts for Christmas cookie baking. The same thing happened when roasting vegetables the next night. When we made a salad, though, there was no rise in PM 1 or PM 2.5.
The fallout from my initial observations over the first few weeks of using the Airthings ViewPlus, then, is that we need to use our range hood more and to open windows when cooking. It was also a good motivator to get that furnace switched to a heat pump and to replace our furnace filters more often.
I have the consumer version of the ViewPlus. This has IFTTT functionality and connects to Amazon Alexa and Google Assistant, but I haven’t tested these as I don’t use them for privacy reasons. Other users report excellent functionality though.
The ViewPlus for Business also offers a noise indicator, which measures sound pressure levels only. This means the monitor can’t and doesn’t monitor what you say, just how loud your environment is (meaning no privacy concerns).
Experimenting with VOCs
As someone who likes to avoid having VOCs in my home, it was a bit of a struggle to find anything with which to test the ViewPlus on this front:
- All my cans of paint are zero-VOC
- I don’t have nail polish or remover with VOCs
- I don’t have new furniture made with VOC-heavy stains or finishes
- There are no vats of formaldehyde hanging around my home.
After some digging around, I found a camp stove canister of propane. I placed this on my desk and left the air monitor to do its thing. After half a day, there was no sign of an increase in VOCs detected by the monitor. There was also no detectable smell coming from the can though, so I think this experiment was a bust.
I moved the monitor to the nursery next, to check a range of measures, and the first thing that happened was a rise in VOCs. We don’t have any new furniture, textiles, or toys that might be the culprit, though, and we have an air filter running almost constantly. As such, this temporary rise in VOC levels is a bit of a mystery.
Fortunately, the VOC levels dropped again, though they’re still higher than in my office. I’m definitely going to keep an eye on this as the nursery is the last place I want elevated VOCs!
I also noticed an increase in CO2 levels in the nursery compared to my office, which makes sense as the nursery is much better insulated. Still, this is a great reminder to air out the nursery even on cold days. PM counts are also higher in the nursery when they spike, which again makes sense as the nursery is on the same floor as the kitchen. These are all good reminders to ensure better ventilation in general.
Things I like about the ViewPlus
There’s a lot to love about the Airthings ViewPlus. Here are a few of the things I’ve noted and appreciated in the few weeks I’ve been using mine:
- A simple display offers customizable readings and a quick assessment of overall air quality
- Incredibly easy to set up and use, using Bluetooth
- Connects to WiFi and has a handy app for on-the-go air quality checks
- Very unobtrusive aesthetic, with rounded edges and a matte white finish
- Has a calm grey/black display showing you select readings on the monitor itself
- Easy to stand up on a shelf or desk, or can be mounted to a wall
- Monitors radon, unlike most other monitors.
I also like that you can quickly get an overall air quality assessment by waving your hand in front of the monitor. This leads to a color-coded flash (red for bad, amber for okay, green for good) from the lights just about the display.
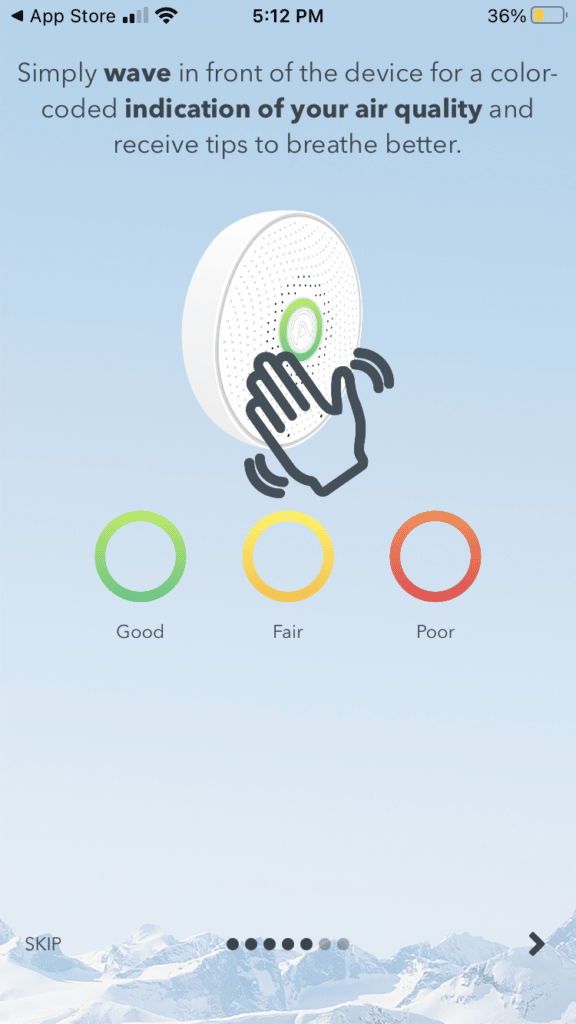
Even though you’re limited to just two measures for permanent display on the monitor, this doesn’t mean you can’t quickly check on the monitor to see if you should be aware of other issues. Say, for instance, you had the display set to temperature and radon and there were no issues there, a quick wave of your hand might alert you to another issue such as high PM 2.5 counts or CO2.
You can also quickly change your chosen measurements through the app at any time. And the app offers short- and long-term graphs of data, plus well-written and thoughtful tips on improving indoor air quality.
Easier to spot problems and potential solutions
My favorite thing about the Airthings ViewPlus is the web dashboard. For data nerds, this is fantastic. Here’s why:
- You can scroll quickly through reams of data (in graph form)
- It’s easy to identify patterns (and potential solutions)
- If you hover your cursor over the line on a graph, it highlights the same data point on the other measures – helps you spot correlations such as simultaneous spikes in temperature and CO2.
Playing with the graphs can also elicit additional data, such as the day, date, time, and exact reading. It’s hard to see such granular detail in the app alone, so if you’re using the monitor to try to identify correlated problems, I highly recommend checking out the web dashboard.
Things that could be better about the ViewPlus
There’s not a lot to dislike about the Airthings ViewPlus. The monitor works great, looks fantastic, and offers a lot of functionality.
Greedy nerd that I am, though, I would love it if I could quickly cycle through all the measures right on the monitor’s display, instead of having to log into the app or web dashboard. That said, you can quickly get an overview of all the readouts in the app and it’s easy to understand what you’re looking at and what it all means. The web dashboard is even better, especially if you want finer detail.
See also: The best indoor air quality monitors
Charging
The Airthings ViewPlus runs on batteries mainly but also comes with a USB-C cable for connection and charging. This may be just me, but it took several minutes before I figured out how to access the USB-C cable port. There’s no diagram for how to do this in the brief manual, nor any help online at Airthings.
Confusingly, there’s an icon for the USB-C cable on the back of the monitor, but it’s right above where you first pull out the battery tab. This makes it seem almost like the cable should fit somewhere in that area without taking the back off the monitor entirely.
You do have to remove the back of the monitor to access the charging port, though. And it wasn’t clear to me how to get the back of the monitor off without risking breaking anything. There are no ‘slide here’ type markings and I was wary of accidentally forcing the monitor open and snapping some plastic.
After some gentle prodding and poking, I realized that the back lifts off with a little force applied in the gap below that USB icon. To open the ViewPlus, hold the monitor with the back facing you, put your thumb or finger in the gap at the middle bottom part of the case and push the tab in and pull the back up and out. This will reveal the six batteries, USB-C port, serial number, and other information on your monitor.
Battery life
When hooked up via USB-C, the monitor will send sample reports every 2.5 minutes. On battery alone, the monitor automatically sends reports every 10 minutes. To preserve battery life, you can toggle settings, so that the monitor only sends reports every 60 minutes. According to Airthings, this setting means your monitor’s batteries could last up to two years! For me, the batteries needed replacing in just over 18 months.
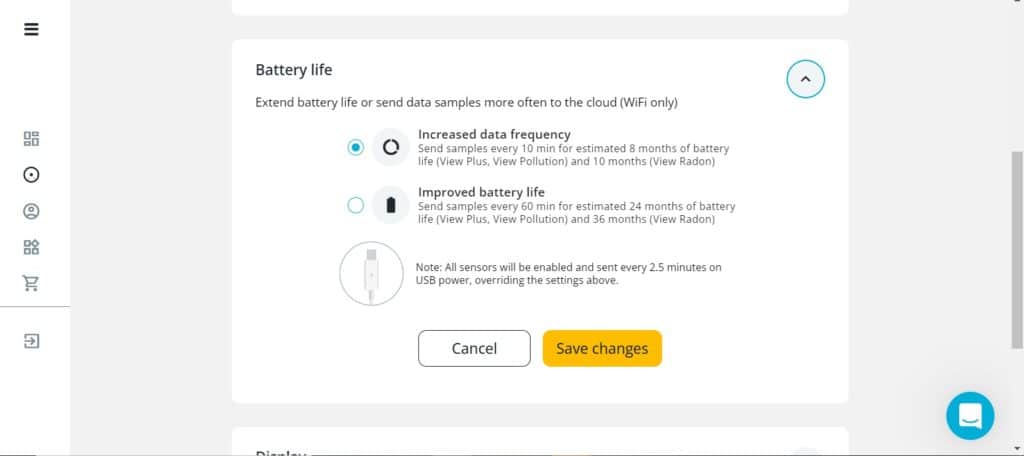
Which brings me to the last negative thing I have to say about the ViewPlus. Unfortunately, you can’t toggle this battery saver setting in the app on the smartphone, nor, seemingly, through the web dashboard if accessed on a smartphone. I had to dig around for a while until I worked out that the way to change this battery life setting is to log into the web dashboard on my laptop. Once there, changing that setting was easy. Whether it makes much difference to overall battery life, I can’t yet say.
Other things to note about the ViewPlus
The Airthings ViewPlus operates on 6 AA batteries and weighs 360 grams, making it lightweight and easily portable. It’s also light enough to mount on a wall using the sticky pads included in the box. As I’ll want to move this monitor around, and have plenty of shelf space in my office, I haven’t mounted it on the wall, but it would fit seamlessly next to my home smart thermostat.
This monitor measures 17 cm by 9 cm by 3.3 cm, making it a bit bigger than some other popular home air monitors.
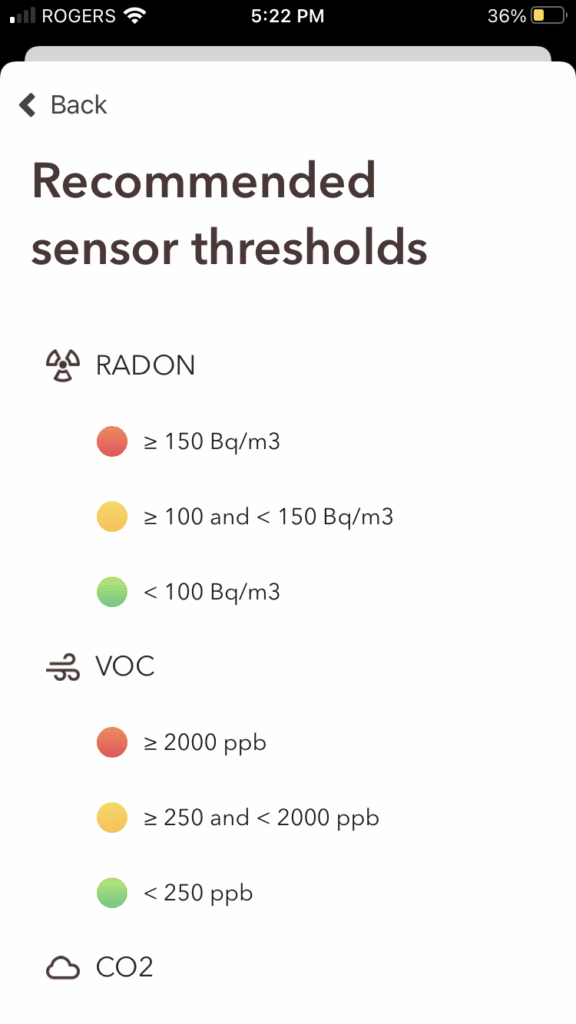
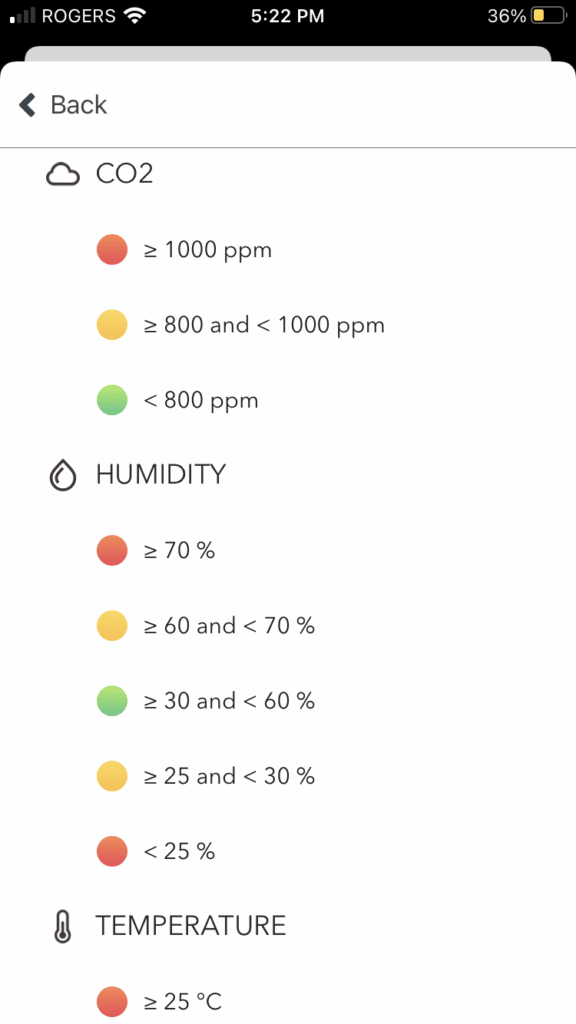
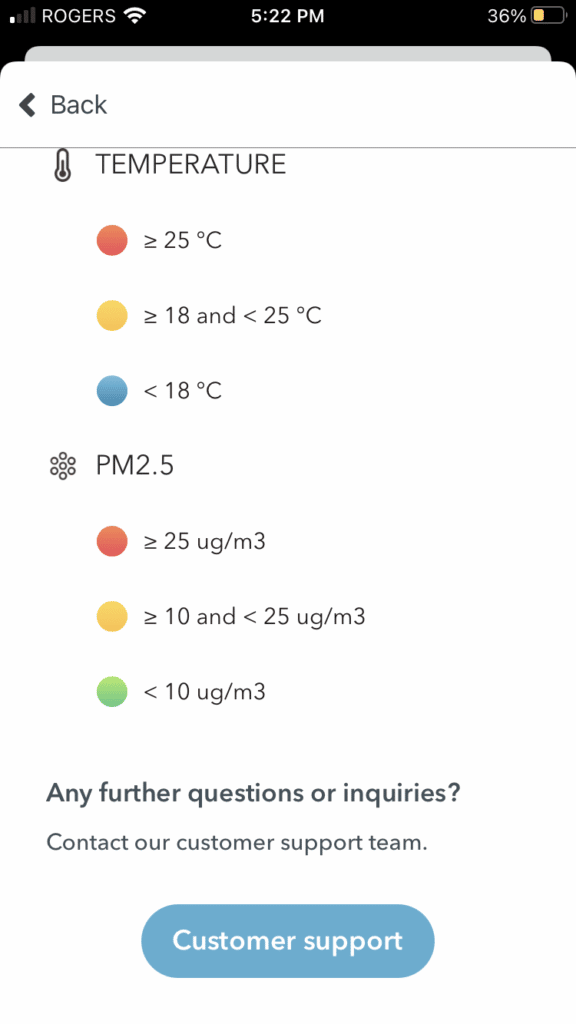
Airthings suggests an initial calibration time of around 7 days for VOCs and CO2. This monitor is intended for use with a temperature range of 4°C to 40°C / 39.2°F to 104°F and humidity of 0% to 85% (non-condensing).
Shipping, warranty, and returns
Airthings offers free shipping, a 12-month warranty, and a 45-day money-back guarantee. If you register your device at the Airthings website, you can extend that warranty to five years for free.
Final thoughts on the Airthings ViewPlus
The Airthings ViewPlus is super easy to use and very easy on the eye. It is quick to set up, offers useful and easily understandable readouts, doesn’t overcomplicate things, and has good customer support when needed. This is also one of the few monitors that measures radon.
Because it is battery-operated and works with WiFi and Bluetooth, the ViewPlus is a handy on-the-go air monitor you can take with you when traveling or use in different rooms in your home or at work.
All in all, I’d highly recommend the Airthings ViewPlus for most home air quality monitoring needs.
A while back, I borrowed a much simpler air quality monitor from a local non-profit. In the same location, under very similar circumstances, this monitor simply shone green, telling me that the air quality overall was ‘good’. I suspect that rating was purely based on PM, with no or little attention paid to VOCs or CO2, and certainly not to radon. For those measures, I would have to use additional monitors at greater cost overall.
Working with the ViewPlus has been so much more satisfying and useful than the simpler, albeit much cheaper, basic air monitor. It offers excellent peace of mind and is easy to use, great for data nerds too, and works well with the Airthings Renew air purifier.
As with any air monitor, where you position the ViewPlus will affect certain readouts. For instance, if you happen to place the monitor right beside a fresh cup of tea, with the side air intakes pointing at said tea, expect that temperature readout to rise!
After my unintentional tea ‘experiment’, I also experimented by putting the monitor right by my face for several minutes. Lo and behold, the CO2 levels rose… to a whopping 3000 in just five minutes, from 1700 before. This was no big surprise, given that humans exhale CO2.
All that to say, be mindful of where you place the monitor. Avoid putting it too close to you or to any heating or cooling appliances, and perhaps don’t place it beside an open vat of formaldehyde, should you happen to have one hanging around.

Hey Leigh
Thank you for a excellent review of the Airthings View Plus monitor.
I was kinda on the fence but your genuine and extremely well written review gave me a realistic opinion of this device.
I will be ordering the View Plus and probably the mini to satisfy concerns we have about our new to us home.
Cheers and thanks again